Professional Tuckpointing Services
"Tuckpointing becomes mandatory when mortar joints have cracked, flaked, or disintegrated due to the abrasive effects of the elements."
Chicagoland Tuckpointing And Masonry Repair
Servicing all your masonry restoration needs while preserving your building's cosmetic appeal...
Our Services Include:
Tuckpointing
Masonry Restoration
Brick Repair
Stone Restoration
Lintel Replacement
Panel Brick Repair
Chimney Repair
Caulking
Waterproofing
Power Washing
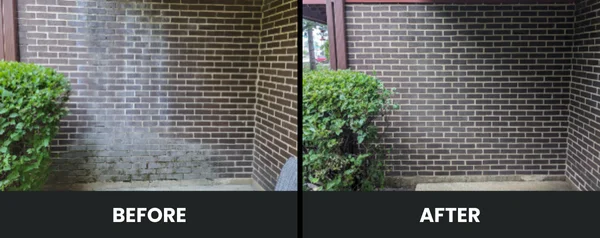
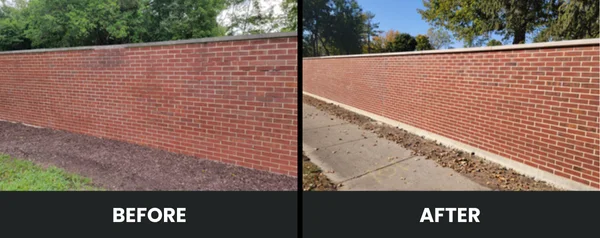
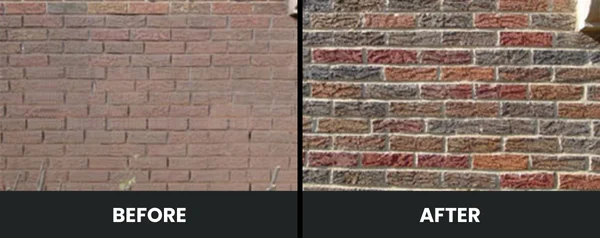
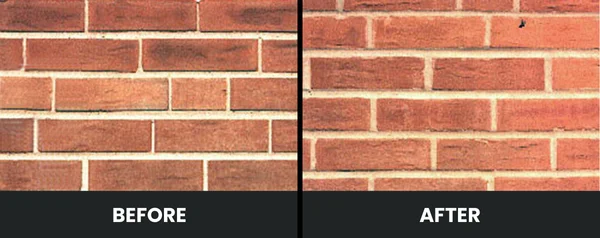
Protect Your Building with Expert Mortar Joint Repair
Tuckpointing repairs the mortar joints between your bricks or stones when they start to crack, crumble, or fall apart. It’s not just about looks (though fresh mortar joints do make buildings look great). It’s about keeping water out, maintaining structural integrity, and preventing small problems from becoming expensive disasters.
If you’re seeing crumbling mortar, gaps between bricks, or water stains inside your building, you need tuckpointing. The longer you wait, the worse it gets.
What Is Tuckpointing?
Tuckpointing is the process of grinding out old, deteriorated mortar from the joints between bricks or stones and replacing it with fresh mortar.
The name comes from an old English technique where masons would fill joints with mortar that matched the brick color, then add a thin contrasting line down the center to make it look like the joints were perfectly thin and uniform. Today, most people use “tuckpointing” and “repointing” interchangeably, though technically:
Repointing = just replacing the mortar for structural and weatherproofing reasons
Tuckpointing = replacing the mortar AND adding that decorative contrasting line for a crisp, clean look
Either way, the structural work is the same. You’re removing bad mortar and replacing it with good mortar to protect your building.
Signs You Need Tuckpointing
Look for These Warning Signs:
Mortar Problems:
- Mortar crumbling or turning to powder
- Cracks in the mortar joints
- Gaps where mortar has fallen out
- Joints eroded back behind the brick face
Water Issues:
- Water stains on interior walls
- White powdery deposits on the brick (efflorescence)
- Leaks during heavy rain
- Mold or mildew problems
Structural Concerns:
- Loose or shifting bricks
- Bricks that stick out or have fallen out
- Walls that look like they’re bulging or leaning
Age:
- It’s been 25-30 years since the last tuckpointing
- Your building is 50+ years old and you don’t think it’s ever been done
If you see any of this, get it inspected. Waiting makes it more expensive. Water gets behind the bricks, freezes in winter, and starts breaking things apart. What starts as minor mortar issues can turn into major structural repairs if you ignore it.
How Professional Tuckpointing Works
The Process:
1. Inspection We look at your entire building to figure out what needs repair and why. Sometimes mortar fails because of bad drainage or other issues that need fixing first.
2. Grinding Out Old Mortar We use specialized grinders to remove deteriorated mortar to a depth of about 3/4 to 1 inch. This has to be done carefully. Go too shallow and the new mortar won’t bond properly. Go too deep or too rough and you can damage the bricks.
3. Cleaning Every joint gets thoroughly cleaned out. Dust, debris, and loose material have to go, or the new mortar won’t stick.
4. Mixing the Right Mortar This is where experience matters. The mortar has to match your existing joints in color and strength. More importantly, it has to be softer than your bricks. If mortar is too hard, it won’t flex when the building moves, and cracks will transfer to the bricks instead of the mortar. Mortar is cheap to replace. Bricks are not.
For old buildings, this often means using lime-based mortars instead of modern cement-heavy mixes. We test and match the original formula.
5. Applying New Mortar Fresh mortar gets packed into the joints in layers, compressed tight to eliminate any air pockets or voids. This creates a solid, watertight seal.
6. Tooling the Joints Once the mortar starts to set up (usually 30-60 minutes), we tool it to match your existing joint profile. Concave, flush, weathered, whatever your building has. This step shapes the joint so it sheds water properly and looks right.
7. Curing Fresh mortar needs time to cure properly. We protect it from rain, direct sun, and temperature extremes. Full strength takes about 28 days, though you’ll see the initial set in 24-48 hours.
8. Cleanup We clean up mortar splashes, wash the work area, and leave your property looking good.
The whole thing takes anywhere from a few days for a chimney to several weeks for a whole building, depending on size and access.
Why This Matters
Structural Integrity
Mortar joints hold your bricks together and distribute the building’s weight evenly. When mortar fails, bricks can shift, walls can bulge, and in extreme cases, chimneys can collapse onto roofs. Tuckpointing fixes this before it becomes dangerous.
Water Damage Prevention
This is the big one. Mortar joints are your first line of defense against water. When they fail, water gets in. Then:
- Interior walls get damaged
- Mold grows
- Insulation gets ruined
- Wood framing rots
- In winter, that water freezes and breaks bricks apart from the inside
Professional tuckpointing creates a watertight barrier that stops all this.
Energy Efficiency
Failed mortar joints are full of cracks and gaps. That’s conditioned air escaping and outside air getting in. Sealed joints mean lower heating and cooling bills.
Property Value
Crumbling mortar makes buildings look neglected. Fresh, crisp mortar joints make them look maintained and cared for. If you’re selling, this matters. If you’re running a business, first impressions matter.
Can You Do This Yourself?
Technically, yes. Realistically, probably not well.
Tuckpointing looks simple but requires:
- Understanding mortar chemistry (wrong mix damages bricks)
- Knowing how deep to grind without damaging bricks
- Matching mortar color and texture
- Proper packing and tooling technique
- The right equipment (commercial grinders, scaffolding, safety gear)
- A lot of time (this is slow, tedious work)
What Goes Wrong with DIY:
Wrong Mortar Use mortar that’s too hard and you’ll crack your bricks. The whole point is that mortar should be the weak point that fails first, because it’s cheap and easy to replace. Bricks aren’t.
Poor Application Air pockets, voids, and weak bonds mean your work fails in a few years instead of lasting 25-30 years.
Color Mismatch Getting mortar to match existing joints takes experience. DIY attempts often look like obvious patches.
Brick Damage Grinding too aggressively chips and damages brick faces. You can’t undo that.
Safety Issues Working on scaffolding or ladders while operating power tools is dangerous without proper training and equipment.
Most DIY tuckpointing attempts end up needing professional correction within a few years. You pay twice and get worse results.
When Pros Make Sense:
For 95% of tuckpointing jobs, professionals are worth it because:
- We get it right the first time
- Work is insured and guaranteed
- We’re faster (days vs. weeks of your time)
- Proper equipment and safety procedures
- Know how to spot and fix underlying problems
- Licensed and bonded protection
How Long Does It Last?
Professional tuckpointing typically lasts 25-30 years. Some factors affect this:
Climate matters: Harsh winters with freeze-thaw cycles, intense sun, heavy rain, and temperature extremes all shorten mortar life.
Quality matters: Good materials and proper application last longer. Cheap shortcuts fail early.
Maintenance matters: Keep your gutters working. Fix drainage problems. Don’t let water constantly hit your walls.
When you see mortar starting to deteriorate again in 25-30 years, that’s normal. Plan for it. It’s regular building maintenance, like a new roof.
Related Services
Tuckpointing often goes hand-in-hand with other masonry work:
- Brick Repair – When individual bricks are cracked, spalling, or need replacement
- Chimney Repair – Chimneys take a beating and often need more than just tuckpointing
- Lintel Replacement – Rusted steel lintels above windows often contribute to mortar failure
- Waterproofing – Additional protection for high-exposure areas
- Caulking – Proper sealant for expansion joints and detail areas
- Stone Restoration – Specialized work for natural stone masonry
- Masonry Restoration – Complete restoration services for all masonry types
- Power Washing – Professional cleaning to remove dirt and staining
We do comprehensive masonry inspections and can handle all of this at once if needed.
Common Questions
How long does tuckpointing take? A chimney might be 1-3 days. A house wall could be a week. A full building exterior might be 2-4 weeks. It depends on size and complexity.
Can you work in winter? Possible but not ideal. Mortar needs temperatures above 40°F to cure properly. We can do winter work with heated materials and enclosures, but spring and fall are better.
Will the color match? We can get about 90% accuracy. Fresh mortar looks brighter initially but weathers and darkens over 6-12 months to blend better with existing joints.
Do you fix cracked bricks too? Tuckpointing is for mortar joints. Cracked bricks are a separate repair, though we can handle both at the same time.
Is this messy? Grinding mortar creates dust. We use tools with vacuum attachments and contain the work area, but some dust is inevitable. We clean everything thoroughly when done.
How do I maintain it? Annual visual checks, keep gutters clean, fix drainage problems, and get a professional inspection every 5 years. That’s about it.
Why Choose Arrow Masonry 50+ Years of Experience
We’ve been serving the Chicagoland area for over 50 years. We know how to:
- Match mortar to your specific brick type
- Identify and fix underlying problems
- Work safely at any height
- Get it done efficiently
- Guarantee our work
We Fix It Right
Poor tuckpointing fails in 3-5 years. Professional work lasts 25-30 years. That’s the difference between cutting corners and doing it right.
Complete Service
One inspection, one project, one contractor. If we find you need brick repair, lintel replacement, or waterproofing in addition to tuckpointing, we handle it all together. No coordinating multiple contractors.
Licensed, Insured, and Bonded
We’re certified and insured for any size project. Your property and our workers are fully protected.
Get Your Free Inspection
Don’t wait until small problems become big ones. We’ll:
- Inspect your entire building
- Explain exactly what you need and why
- Give you a detailed, transparent quote
- Answer all your questions
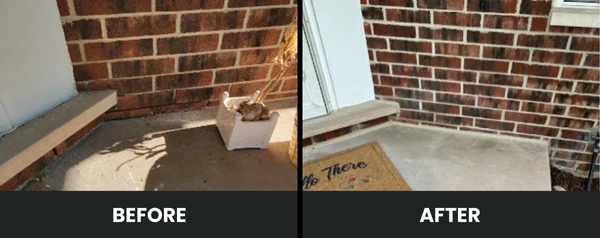
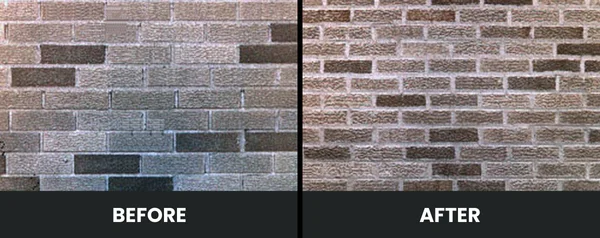
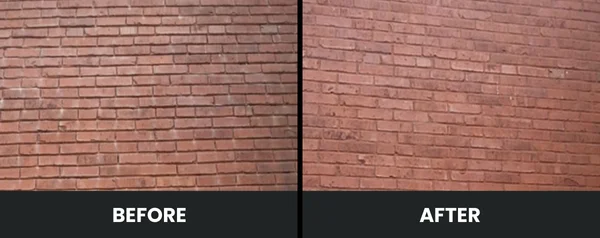
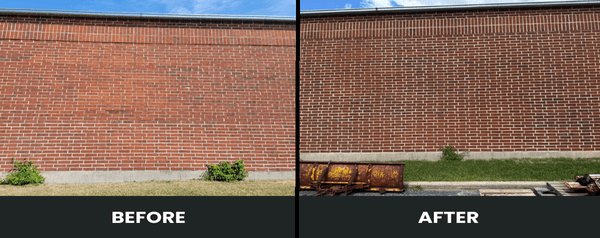
- Show you examples of our work
No pressure. No obligation. Just honest assessment and fair pricing.
Contact Arrow Masonry
Call: (847) 776-6400
We serve the entire Chicagoland area with professional tuckpointing and complete masonry services.
Learn more about our company and our commitment to quality masonry restoration.
Professional masonry restoration since 1972. Licensed, insured, and committed to protecting your building for decades to come.
Tuckpointing F.A.Q.s
Look closely at your masonry wall and if you notice voids, cracks, crumbling mortar, or uneven areas of mortar, chances are you need tuckpointing.
Any trapped moisture within the brick will react with the salts inside. As the moisture evaporates, the salts will crystallize on the masonry surface, creating white efflorescence. This powdery substance is seasonal and will dissipate on its own, but may reoccur. It can be temporarily halted with a mild muriatic acid solution.
The existing mortar color and profile can be matched (with approximately 90% accuracy) through careful manipulation of the actual color additive. Newly applied mortar will appear sharper in color because it hasn’t had a chance to weather and oxidize.